 Optical Fiber
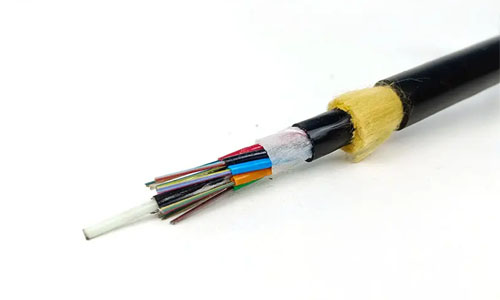 ADSS Fiber Optic Cable
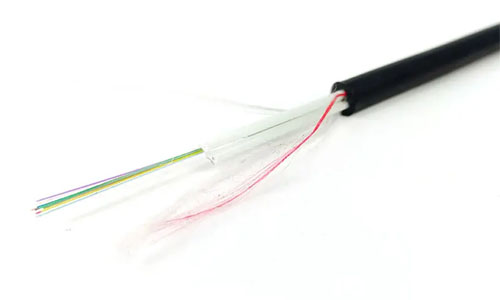 ASU Fiber Optic Cable
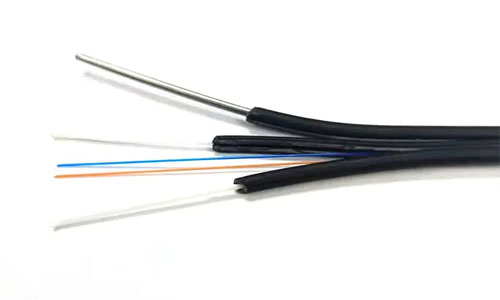 FTTH Fiber Optic Cable
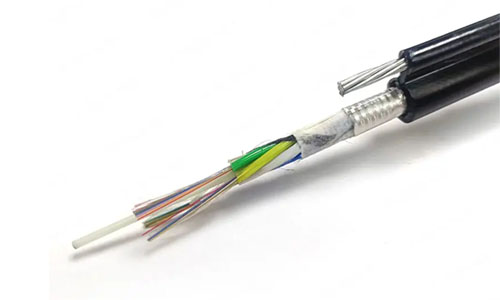 Figure 8 Fiber Optic Cable
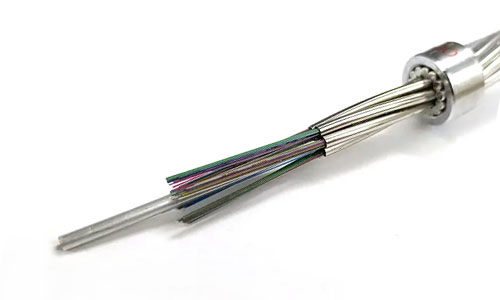 OPGW Fiber Optic Cable
 Coaxial Cable
 Ethernet Cable
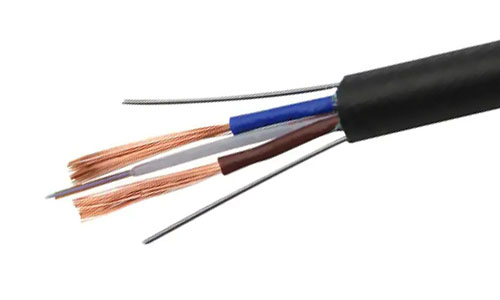 Photoelectric Composite Fiber Optic Cable
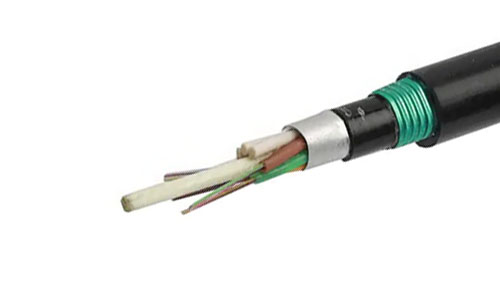 Underground & Pipeline Fiber Optic Cable
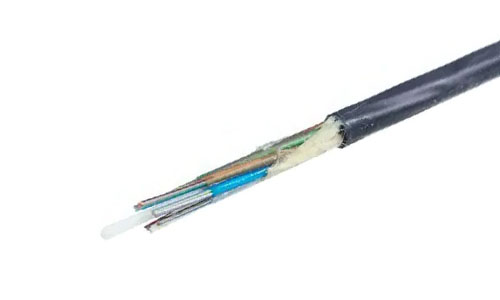 Air-Blown Micro Fiber Optic Cable
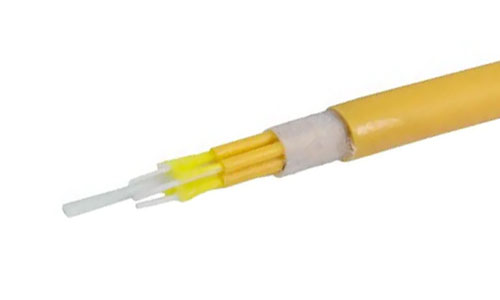 Indoor Fiber Optic Cable
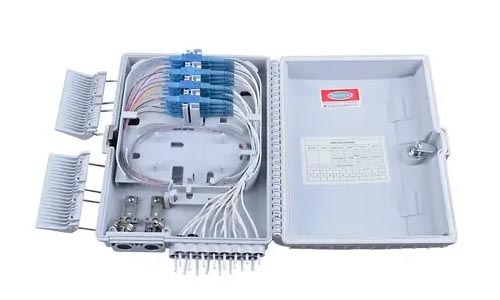 Fiber Optic Distribution Box
 Multiport Service Termina Box
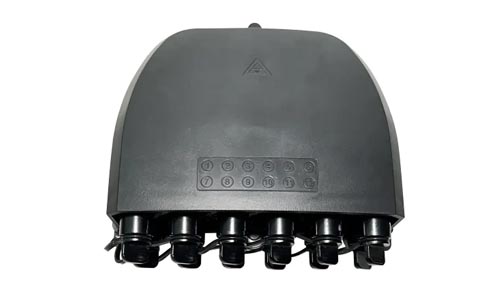 Fiber Optical Terminal Box
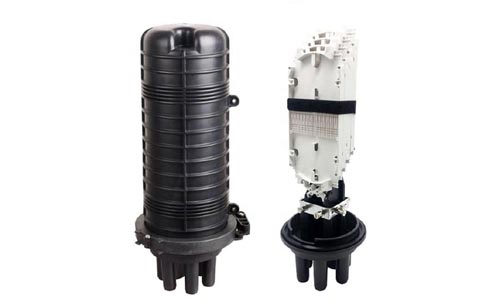 Fiber Optic Splice Closure
 Fiber Optic Clamps
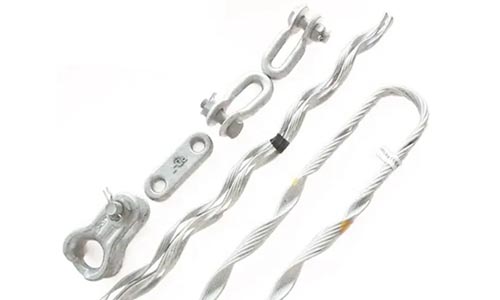 Fiber Optic Cable Fittings
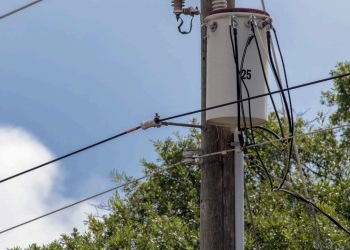 ADSS Fiber Cable
 ASU Fiber Cable
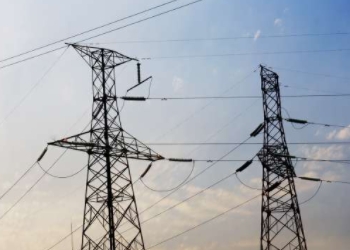 OPGW Fiber Cable
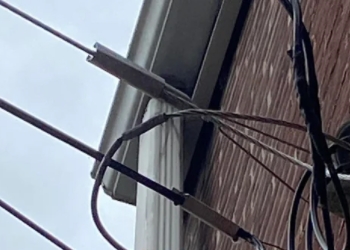 FTTH Fiber Cable
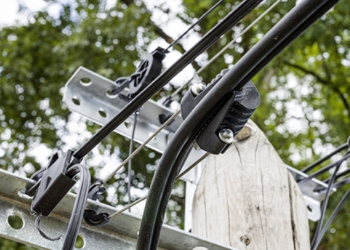 Figure 8 Fiber Cable
 Photoelectric Composite Fiber Cable
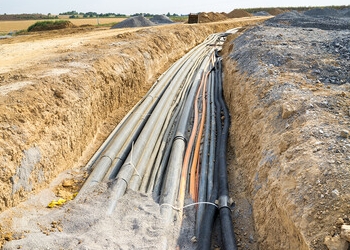 Underground & Pipeline Fiber Cable
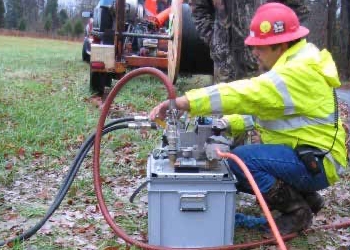 Air-Blown Micro Fiber Cable
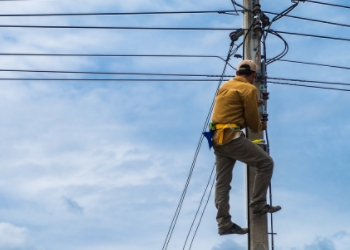 Aerial Fiber Cable
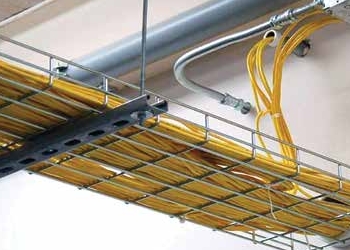 Indoor Fiber Cable
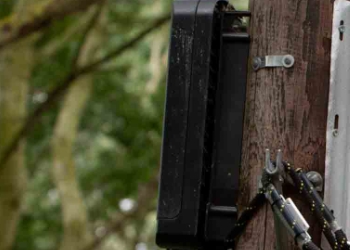 Fiber Optical Terminal Box
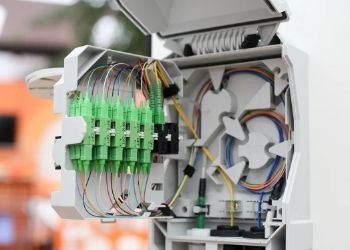 Fiber Optic Distribution Box
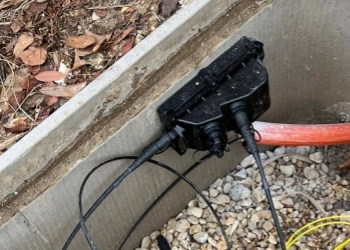 Multiport Service Termina Box
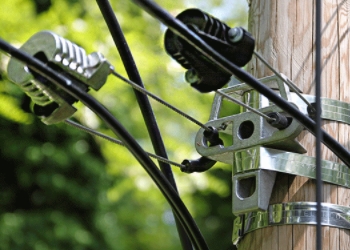 Fiber Optic Clamps
 About Us
 Our Team
 History
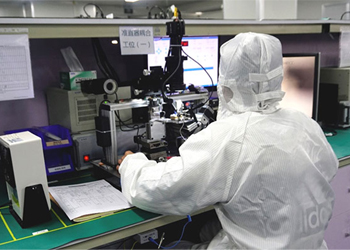 R&D Strength
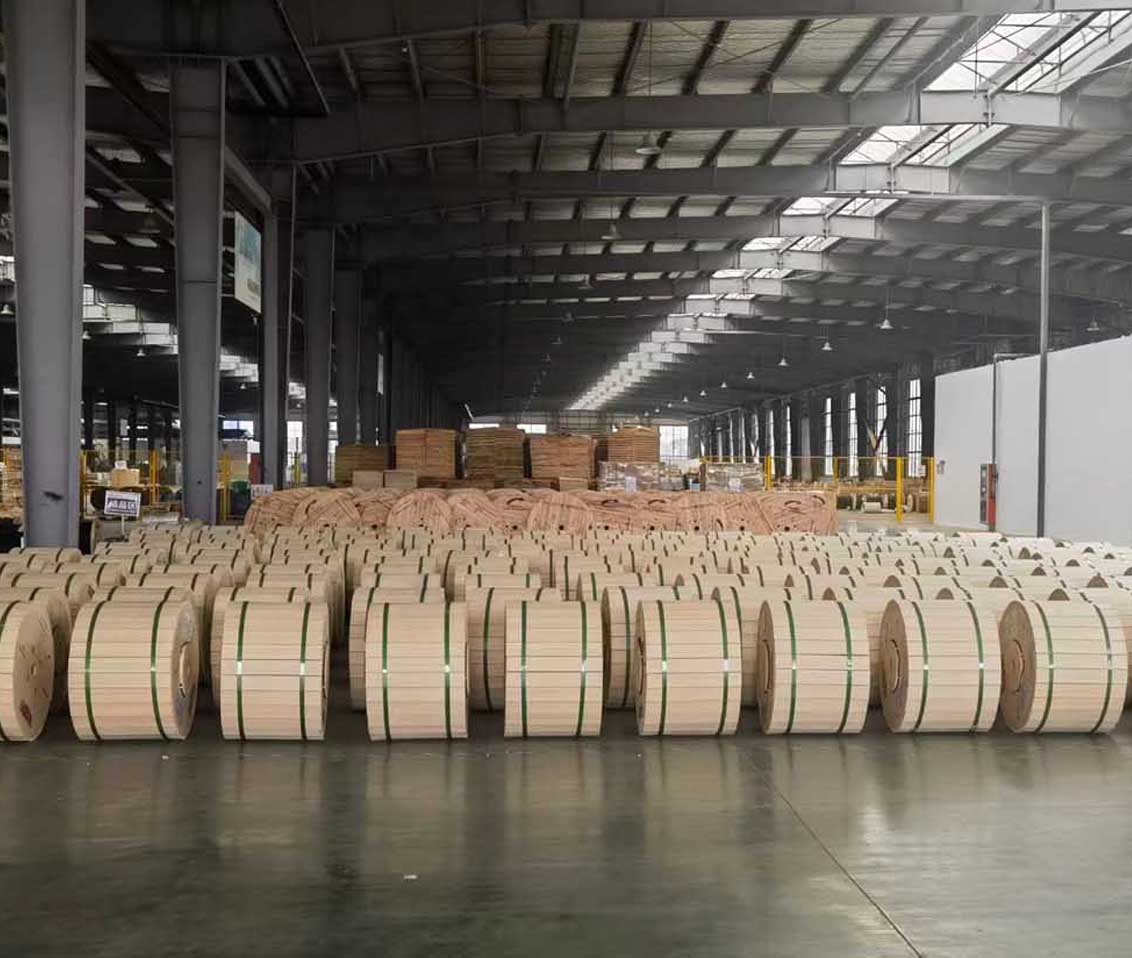
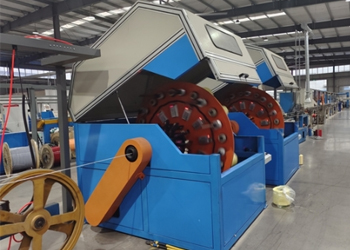 Production Base
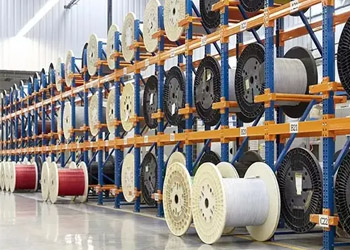 Warehouse & Logistics
 Quality
 FAQs
FAQsHow to Install Fiber Optic Cables?
Contact for Free Quotation & Sample, According to your needs, customize for you.
inquiry nowHow to Install Fiber Optic Cables?
Fiber optic installation involves transmitting data through light signals in glass fibers, offering faster speeds and greater reliability compared to traditional copper wiring.
Proper planning, from conducting as-built site surveys to designing the network, is key to ensuring a successful installation of fiber optic cables. Avoid hefty fines and lawsuits by following local codes and obtaining applicable work permits.
Fiber optics are the backbone of our communication and digital infrastructure. They support advances in broadcasting, medical imaging, and in thrilling new applications like IoT and smart cities.
Whether to use indoor or outdoor fiber optic cables is an important decision. Evaluate the planned application, distance and bandwidth needs to determine if single-mode or multi-mode cables are appropriate.
For lasting performance Avoid tight cable bends Test your system connections Use industry-proven protective products This method greatly reduces signal loss and is considered a best practice.
High quality Fiber optics provide the fastest speeds and highest bandwidths available. Fiber cables significantly outlast their copper counterparts and therefore provide a comprehensive solution to future-proofing today’s communication networks.
-
1.Touch install fiber optic cable. -
2.When you install fiber optic cables, there is a comprehensive procedure involved for performance and connection.
-
3.First, properly clear the installation location.
-
4.After that, route the cables with precision to avoid damaging the fiber and organize them back to the necessary network equipment.
-
5.After all, fiber optic cables are the backbone of today’s high-speed data communications infrastructure.
-
6.They enable everything from internet to medic telecommunications.
-
7.In this tutorial, we’re going to take you through the basics in getting your first install right.

What is Fiber Optic Installation?
Fiber optic installation is the process of deploying a network that relies on light signals to carry information. It is accomplished by using the latest technology through thin strands of glass or plastic fibers.
These fibers transmit internet, telephone, and television data at the speed of light, making them an essential building block of any competitive community’s communication infrastructure. The demand for reliable, robust, and fast connectivity continues to increase.
Consequently, fiber optic networks have grown increasingly important in enabling ubiquitous internet access, telecommunications, and data-heavy enterprise applications.
Fiber optics don’t have these downfalls. Fiber optic cables can carry more tones information at exceptionally high speeds 10 gigabits per second or even faster.
This enormous capacity allows them to move data at lightning speeds without interruption. They are more resistant to signal loss and electromagnetic interference, providing a cleaner and more reliable connection.
Their characteristics make them ideal for applications that require both extreme bandwidth and low latency. This is everything from video streaming to online gaming to cloud computing.
Define Fiber Optic Network Installation
Getting ready to install a fiber optic network isn’t just about installing, it’s a step-by-step process that involves planning, installation and testing. Start by planning out the network design.
After that, you can determine the most appropriate installation method—direct burying, plowing, or aerial installation. The installation requires a convoy of specialized equipment.
You’ll work with fusion splicers for permanent connections and OTDRs (Optical Time Domain Reflectometers) to test the integrity of splice cable. Once installed, technicians will then connect the cables to corresponding communication devices or networks.
They typically accomplish this using techniques like fusion splicing or temporary connectors.
Fiber optic cabling, patch cords, connectors, splitters, and transceivers are all essential components of the installation. Each component functions in sync to ensure data is delivered effectively.
Professional technicians have the knowledge and experience to handle such complex parts and ensure the backbone of the network is installed finely. They are phenomenal at things like splicing fibers, their technique of joining two fibers which takes a few minutes to perform.
This unusual ability greatly increases the network’s resilience.
Fiber Optic Cable Applications
Currently, fiber optic cables are the most popular medium for telecommunications, providing high-speed internet service and powering traditional broadcasting services.
They’re vital to industrial automation systems and feeding the development of medical imaging technologies ranging from endoscopy to CAT scans.
Emerging applications include smart cities and IoT solutions, where fiber optics enable real-time data transmission for connected devices and infrastructure.
Fiber Optic Cable Essentials
Fiber optic cable installation is a complex, multi-step process, demanding a complete knowledge of every component, tool and material used in the process. These interactive components collectively prevent any loss of connection, providing high-speed data at great distances.
Whether you’re expanding a Local Area Network (LAN) or deploying fiber-to-the-home (FTTH) systems, every line calls for care and accuracy. You have to have the right resources in there if you’re going to be successful.
Fiber Optic Cable Types Overview
Designed for long-distance communication, this cable uses a narrow core (around 8-10 microns) to transmit a single light mode, reducing signal loss. It is best suited for high-performance applications including, but not limited to, telecommunications and data centers.
Built with a larger core (50-62.5 microns), this type is suited for shorter distances, such as in office networks, offering cost-effective solutions for moderate bandwidth needs.
Based on your unique distance and bandwidth needs, the decision on which cable type is appropriate will vary. Single-mode fibers are superior over distances more than six miles. Multi-mode fibers are ideal for LAN installations under 1,000 feet.
Understanding Fiber Optic Cable Diameter
Cable diameter in turn directly correlates with the amount of light that can be transmitted and efficiency. Standard cable fiber sizes such as 250 microns for single-mode and 900 microns for multi-mode fibers give an excellent compromise between durability and performance.
Thinner cables perform better in environments with space constraints, but thicker perform better with the cable handling aspects upon installation.
Exploring Fiber Optic Cable Range
Fiber optic cables perform better than other alternatives, such as copper, in these capacities as well in range and reliability. Attenuation—signal degradation over distance—can be reduced through careful splicing and newer materials.
New technology, such as quantum repeaters, even extends the effective range, making long-distance connectivity even more feasible.
Fiber Optic Cable Speed Capabilities
Fiber optics offer unmatched speed, supporting data rates up to 1 Gbps or higher, essential for streaming, gaming, and remote work. Unlike copper cables, which peak out at around 100 Mbps, fiber provides significantly faster speeds.
This dramatic increase in speed makes user experience and service delivery extraordinary.
Materials in Fiber Optic Cables
Fiber optic cables are usually made of glass, but can be made from plastic, as the material is selected based on its ability to propagate light. New technology in materials makes a more durable cable, even for locations with extreme temperatures and conditions, without sacrificing performance uniformity throughout the life of the cable.
Planning Your Fiber Optic Installation
With careful consideration and planning, your town or city’s fiber optic installation can run smoothly. So, with the right know-how, you can dodge those rookie errors and make sure everything goes off without a hitch. Below, we explore important steps to enable you to create your own successful fiber optic installation plan.
1. Conduct a Thorough Site Survey
A good site survey is your first step towards setting the right expectations about the project’s scope. Begin with a look at the existing infrastructure. Access existing ducts, conduits or poles and be mindful of both above and below grade space constraints and utilities.
Environmental elements, such as prevalent weather patterns and soil type, should be factored in as well, as they directly affect cable installation. Accurate fiber optic installation is dependent on precise measurements and all elements of installation.
Avoid back-of-the-napkin calculations and use distance-measuring wheels or laser rangefinders to precisely document distances. Identify locations for splice enclosures and any termination points. Providing a thorough level of documentation will help inform downstream phases and prevent surprises down the line.
2. Design the Network Layout
Creating the network layout includes planning the most efficient paths for the fiber optic cables. Key considerations include making cable runs the shortest they can be to reduce potential signal loss.
Avoiding sharp bends is crucial to reduce stress on the cables. Additionally, work in future scalability consideration by ensuring space is left for more cables to be added. A general guideline is a never-fill-more-than-40%-of-your-ducts fill ratio to avoid jamming cables.
Install slack cable—20 to 30 feet per drop—at each location for slack so in the case of repairs or adjustments are required. Providing detailed network diagrams will become important to the process for visualizing this plan and communicating it to stakeholders.
3. Determine Installation Requirements
Plan for the proper tools and materials, including fusion splicers, jewel quality fiber cleavers, and quality cables. Protective equipment such as gloves and safety glasses and appropriate signage should be used as well.
Estimate the technical expertise needed for tasks such as splicing or testing, and plan for training if needed. Early and ongoing coordination with utility providers is vital to identify any potential conflicts with existing infrastructure.
4. Obtain Necessary Licensing
Prior to installation, educate yourself on your local regulations and obtain all necessary permits. Compliance protects public safety and prevents litigation.
Licensing doesn’t just control access; it imposes quality requirements, something increasingly critical in robust, high-performance networks.
5. Prepare Required Materials
Prepare necessary installation materials for successful network deployment, including appropriate cables, connectors, and protective enclosures. Using high-quality materials dramatically reduces the chance of failure and gives you confidence in long-term performance.
Keep all your tools and materials in a safe, dry location to prevent damage and always inspect everything upon use to address defects early.
How to Install Fiber Optic Cables
Installing fiber optic cables is an extensive, deliberate process designed to tailor performance requirements to the application—ensuring long-term reliability. From pre-construction through to final activation, sticking to best practices at every stage of the process is key to receiving a successful installation.
Keep reading below, as we guide you through the key stages of the installation process.
1. Prepare the Fiber Optic Cable
Thorough planning determines the success of any fiber optic installation. Begin by removing the cable jacket with a precision stripping tool to prevent any abrasion of the fibers.
Then, use a fiber cleaver to create a clean, even end face for optimal light transmission. Clarity on each of these steps is of the utmost importance. Any misalignment, however slight, could result in signal loss.
The must-have tools are a fiber stripper, cleaver and safety glasses to safeguard your eyes from loose fibers.
2. Choose an Installation Method
Depending on your community’s needs, fiber optic cables can be installed either aerially or underground. Aerial installations can be much faster to deploy and more cost-effective, perfect for shorter distances or regions where utility poles already exist.
While more expensive and labor-intensive, underground installations are much better protected from environmental factors and physical damage. Terrain, available budget, and the size of the project will all affect which installation method is most suitable.
For instance, extensive planning must go into underground installations to ensure no more than four 90-degree turns are made per conduit run.
3. Install Fiber Strands Securely
How fiber strands are secured can be the difference in avoiding both signal loss and physical damage. Support the installed cables at frequent intervals to minimize cable stress and prevent excess cable tension or pull.
Support structures, like messenger wires or inner ducting, ensure that the cables stay aligned and protected. Proper cable management, including bundling and cable routing, keeps the system visual, neat and makes it maintainable.
4. Secure Fiber Cables Properly
-
Do not make sharp bends, keeping a minimum bend radius of 20 times the cable diameter in tension.
-
Utilize conduit as protection for the cables, and cable ties for securing cables.
-
Give enough slack of at least 20-30 feet for possible repairs or future splicing.
5. Add and Protect Splice Points
These splice points are used to connect different fiber segments and need to be protected from environmental dangers. Implement splice trays and enclosures to ensure all connections are adequately maintained.
Add a moisture barrier wrap around splices so moisture and dirt won’t affect the signal.
6. Connect Fiber Segments Carefully
Since fiber connections are sensitive to both alignment and pressure, precision is critical during the installation process. Once connected, conduct tests on the connections to ensure that the signal is clean and intact.
Portable tools such as optical time-domain reflectometers (OTDR) are invaluable to help technicians quickly identify any faults.
7. Implement a Blowing Procedure
Using air to blow cables into ducts is an extremely fast method for long, straight runs. Recommended minimum rating for an air compressor is 375 cfm.
For installations up to 131–328 feet, use lubricants that are compatible with cable jackets. Keep a duct fill ratio no more than 40% to make sure you can install them easily and without damaging the fiber.
8. Dropping Cable Installation
Next up are drop cables which run from buildings to the main network. When selecting cables, consider both distance and environmental requirements.
At the time of installation, take care to adhere to all safety procedures, including properly securing cables to avoid tripping hazards.
9. Setting Up Electronics and Network
-
Connect fiber to network devices like switches or routers.
-
Configure devices for optimal data flow.
-
Test and troubleshoot to ensure proper functionality.
Fiber Optic Cable Connection Methods
Whether you’re splicing or terminating a fiber optic cable, knowing the different connection methods is key to maximizing performance and reliability. The two main connection methods available are through fusion splicing and mechanical splicing, both providing different advantages and factors to weigh.
Choosing the most suitable connection method varies based on project needs, cost considerations and the environment in which cables are deployed.
How to Connect Fiber Optic Cable
Connecting fiber optic cables takes meticulous effort to ensure the high-quality signal is uninterrupted. Then, as with other methods, you get the cable ready by stripping the outer jacket and buffer tube, introducing the fiber. This means using tools such as a fiber stripper and cleaver.
For fusion splicing, the fibers are first aligned in a precision splicing machine, which melts and fuses the fibers into a single continuous connection. Mechanical splicing relies on a plastic alignment sleeve to keep the fibers in contact.
Although fusion splicing gives more durable and lower loss connections, mechanical splicing is faster and more cost-effective for temporary installations. For reliable and repeatable results, always work in accordance with manufacturer guidelines.
Terminate Fiber Optic Cable
Termination requires installing connectors to the ends of the cable. This process begins with the removal of cable sheath, cleaning of the fiber and termination of the connector with a potted fiber. Precision is paramount, since any improper termination can result in signal loss or potential damage.
Specialized tools, such as crimpers and polishing kits, help make safe, concise connections. Connectors with maximum low insertion loss are ideal for structured cabling systems. These systems adhere to the practices outlined in Telecommunications Industry Association standard TIA-568.
With proper termination, maintenance and system upgrades are simple to execute.
Splice Fiber Optic Cable
Splicing physically connects two fibers to create a continuous, unbroken link. Fusion splicing involves high-heat welding, and mechanical splicing uses alignment sleeves to align the fibers.
Fusion splicing is the preferred connection method for permanent connections because they last longer and have a lower signal loss. Third-party testing tools, such as an optical time-domain reflectometer (OTDR), ensure that the splice is guaranteed to meet or exceed performance standards.
How Long Splicing Takes
Splicing time depends on the precision and skill of the technician and the splicing equipment. Forty fiber fusion splicing typically takes 5-10 minutes per splice, though mechanical splicing is faster.
Prepare for an effective workflow by factoring in setup, testing and environmental extremes.
Best Practices for Fiber Installation
When you’re installing fiber optic cables, adherence to best practices are very important. We’ve found that it helps you execute your installation with increased efficiency, reliability, and long-term performance.
Getting it right the first time through detailed planning and following installation best practices minimizes costly mistakes and time lost with rework. Here are some best practices that every installer should adopt.
Adhering to Fiber Optic Cable Bend Radius
The available bend radius of a fiber optic cable is an important aspect of preserving signal integrity. This specification shows how far a cable can bend without causing damage or performance degradation.
Going beyond the minimum bend radius will lead to signal loss. Perhaps most importantly, it can cause irreversible fiber fracture, endangering the whole network.
To avoid kinks and bends, keep bends to a minimum and use cable management solutions such as guides or trays that promote smooth, sweeping curves. When turning corners and going through tight areas, make sure cables have support to keep them from kinking.
For instance, whenever you need to change direction, such as in a 90-degree turn, use sweeping curves instead of right-angle bends. Always consult the manufacturer’s specifications for minimum bend radius to observe the limits.
Understanding Fiber Optic Cable Color Code
Fiber optic cables use standardized color codes to simplify identification. In multi-fiber cables, standard codes differentiate fibers. Blue is the initial fiber installed, orange is the second and green is the third.
These codes are important to ensure the right connections are made while splicing or terminating. Color coding helps prevent mistakes when the infrastructure requires maintenance or upgrades.
For example, when troubleshooting a network, clear identification of fibers speeds up the process and prevents errors. Keeping a living chart of these codes goes a long way in improving precision and increasing the up time down.
Addressing Environmental Factors
Outside factors such as temperature changes, moisture levels, and UV exposure need to be taken into consideration when planning fiber installations. For external installations, prefer cables with an outdoor-rated jacket to ensure they withstand exposure to moisture and temperature extremes.
In colder climates, choose fiber plant materials specifically developed for use in freezing conditions. For instance, loose-tube cables are best for environments where there is expected expansion and contraction.
After installation, regular inspections ensure that any future environmental impacts can be addressed quickly. This forward-thinking mentality reduces the chances of performance problems in the future.
Cable Routing in Existing Infrastructure
Adding fiber into existing buildings may have different challenges, like fewer points of access available or old conduits. Retrofitting can be great, but careful planning is key to preventing disruptions.
For example, pre-mapping out every cable route and verifying structural integrity in advance can help avoid the costly installation delays associated with retrofitting. Flexible conduits, where appropriate, can create the room needed to maneuver in tight spaces without risking damage to the cable.
Future-Proofing Strategies
-
Use higher-capacity cables to support future data demands.
-
Design networks with modular connections for scalability.
-
Employ technologies like wavelength multiplexing to expand capacity.
Scalable designs help ensure networks can grow and adapt as technology advances, saving money in the long run.
Testing and Troubleshooting
It’s important to test and troubleshoot fiber optic cables after they have been installed, so that your network will be performing at its peak performance. By preemptively testing every connection, you’re able to detect and troubleshoot problems before they affect performance. Given that over 90% of internet traffic relies on wireless clients like phones and TVs, maintaining the integrity of fiber optic networks is essential to supporting these connections.
Specialized tools and techniques are key to accurately diagnosing and maintaining fibre optic systems.
Using a Fiber Optic Cable Tester
A fiber optic cable tester becomes the most important fiber optic tool during installation. It tests to make sure the fiber link is operating properly, connected correctly and performing at optimal levels.
Testers such as the Visual Fault Locator (VFL) are popular among fiber testers for their ease of use and efficacy. A VFL can quickly identify breaks, faulty splices, or misaligned connectors by emitting a visible red light through the fiber, making defects easy to spot along the cable's length.
Optical Time-Domain Reflectometers (OTDRs), while expensive and complicated, give an in-depth diagnosis of a cable’s health. They do an excellent job of measuring loss and identifying faults over vast stretches. A VFL is excellent for continuity and polarity checks.
An OTDR is stellar at providing a picture of the entire optical link, which in turn minimizes the mean time to repair (MTTR) when installing or troubleshooting. When using these tools, basic calibration and calibration-specific requirements are necessary. Follow the manufacturer’s specifications to get the best results.
Diagnosing Faults with Emerging Technologies
These novel technologies can really improve fault detection capabilities in fiber optic systems. Sophisticated diagnostic tools, such as active fiber monitoring (AFM), passively monitor the network in real-time to detect any faults or attempted intrusions.
AFM offers real-time alerts, enabling you to take action right away, unlike periodic checks that leave you vulnerable. Handheld devices such as fiber identifiers (FIs) make testing on the spot easier by identifying live signals without the need to disconnect cables, reducing downtime.
Keeping abreast of creative solutions is important, especially with the fiber optics testing market expected to grow at almost 9% per year. Tools and software designed to these industry standards, such as those created by the Fiber Optic Association (FOA) and the International Electrotechnical Commission (IEC), ensure compatibility. They improve reliability, too.
Quality Control Measures Post-Installation
-
Verify signal levels and loss margins with an OTDR or VFL.
-
Document installation details, including test results and cable layouts.
-
Schedule regular maintenance to detect wear and optimize performance.
-
Use AFM for ongoing monitoring and quick fault detection.
Fiber vs. Copper: A Comparison
When it comes to data transmission, fiber optic and copper cables are two completely different technologies with different advantages. Fiber optics, with incredible speed and reliability, allow for much quicker data transfer than copper. Copper cables, though cheaper in the short term, run into restrictions that render them unsuitable for today’s high-demand, high-tech needs.
Keep reading below to see how these two technologies stack up against each other in a number of key areas.
Why Fiber Optic Cables Excel Over Copper?
Fiber optic cables have many clear benefits compared to copper. One major advantage is their robustness. Fiber can transmit enormous amounts of data with virtually no signal degradation, even across great spans.
Copper cables usually start degrading beyond 328 feet (100 meters). Fiber optics lose no signal integrity even over miles. They provide a much greater bandwidth as well, supporting speeds up to 800 Gbps, versus copper’s maximum of 10 Gbps.
Fiber has immunity to electromagnetic interference (EMI). This resistance ensures reliable operation, even in high-electrical-noise environments such as factories or data centers.
As every industry focuses on the need for faster, more reliable networks, demand for fiber optic solutions continues to soar. Whether improving connectivity for agri-tech enterprise scale solutions or distributed residential broadband, fiber optics provides more robust solutions for today’s infrastructure needs than copper.
Fiber Optic Speed vs. Copper
-
Fiber Optic Cables: Up to 800 Gbps over long distances.
-
Copper Cables: Limited to 10 Gbps, effective range around 328 feet.
The digital divide created by the speed gap between these technologies has long-term, detrimental effects on internet service providers and users alike. Fiber optics flexibly handles the high-speed demand of 4K streaming, cloud computing and remote work that can leave copper stranded.
Fiber Optic Cable vs. Ethernet
Ethernet, usually copper-based, works adequately for short-range installations but doesn’t have the same long-distance capacity as fiber. Fiber optics allow for smooth data transmission between cities, or even continents without the signal drop-off that you may experience with Ethernet.
This benefit has spurred massive infrastructure migration to fiber in telecom and enterprise networks.
Fiber Optic Cable vs. CAT6
While CAT6 cables might be great for your local network, in comparing speed and bandwidth, they don’t even come close to fiber optics. Fiber can easily accommodate bandwidth-hungry applications, such as video conferencing, server and cloud storage connections, and more.
This is one of the application categories where CAT6 might flounder.
Fiber Optic Cable vs. Coaxial
-
Superior bandwidth and reliability for modern networks.
-
Coaxial Cables: Prone to interference and limited in performance.
Fiber Optic Cable Bandwidth
Fiber’s unmatched bandwidth can accommodate even the fastest internet speeds, providing lag-free connections to dozens of users and devices all at once. While quality of installation and hardware will impact performance, fiber cannot be beaten when it comes to overall scalability for networks of the future over time.
Cost Considerations for Fiber
When investing in fiber optic technology, several cost considerations play a significant role in shaping the total installation cost. We hear that fiber optics frequently has higher upfront costs than other internet solutions.
Though the up-front costs are higher, the long-term savings and greater efficiency make it a worthwhile investment. Cost considerations for fiber are crucial to understand. Below, we unpack the major considerations to give you a clearer picture of the financial world of fiber optic installations.
Fiber Optic Installation Cost Factors
There are many factors that figure into the cost of installing fiber optics. Other materials, in particular fiber cables, conduits and microducts, can feed dramatically into price.
For comparison, the approximate cost of a 12-strand single-mode fiber cable is $8,500 to $10,000 per mile. In comparison, a 96-strand version costs anywhere from $20,000 to $30,000 per mile.
For aerial installation, labor costs typically run in the hundreds to thousands per mile. Underground installations run from $5,000 to $20,000 a mile due to additional excavation and conduit installation.
The size and intricacy of your project is a big factor as well. Larger networks spanning several miles or in regions needing fiber underground will tend to require larger costs.
Allowing in-construction contingencies for things like newly-added permitting fees or other unanticipated site-specific hurdles allows projects to avoid sinking funds into surprises.
Understanding Fiber Optic Installation Price
Determining potential installation costs involves looking at many variables including geographic area, the scale of the project, and nature of the installation.
For example, aerial installations tend to have a lower cost per foot, usually between $0.09 and $1.52. In contrast, underground installations typically range from $1 to $6 per linear foot.
Conduit costs, depending on duct size, add an additional $2 to $4 per linear foot. Regardless of federal funding, service provider pricing is heavily influenced by competitive market forces.
Getting several quotes helps you keep costs low and gives you a clear picture of how different providers structure their pricing given your unique needs.
Fiber Optic Cable Repair Cost
Repair costs will vary based on the severity of damage, location and amount of labor required. Routine maintenance decreases the necessity of costly reactive repairs while prolonging the cable’s life cycle.
Microducts in Fiber Optic Deployment
Microducts simplify installation by minimizing both labor and material expenses. To scale for effective future deployment, you would try to have a 40% fill ratio to maximize the space in the duct and still allow for upgrades.
Conclusion
Speed, reliability, and efficiency—these are the benefits of fiber optic cables that can revolutionize your network. When you don’t take the right steps and use the proper tools, you doom yourself to a system that requires constant and costly fixes. Careful planning, accurate installation, and thorough testing are what make all the difference. Focus on quality at every stage to avoid future issues.
Whether you’re making the move from copper, or going straight to fiber as a new development, fiber has distinct advantages. This allows for much higher data rates, longer distances and overall better performance. Though the initial price tag might look more expensive, the long-term value is tough to match.
Looking to learn more about implementing fiber? Understand the fundamentals, put your money where your installation is, and experience the difference for yourself. Fiber is the way to future-proof your network and ensure it will be faster and smarter.
Frequently Asked Questions
What is fiber optic installation?
Fiber optic installation is the process of deploying and establishing fiber optic networks that supply fast internet through broadband connections or local area networks. In fact, it involves meticulous installation, the right equipment, and safety precautions to deliver peak performance.
What tools are required for fiber optic cable installation?
First, fiber optic stripper Cleaver Splicing tools Connectors Power meter You’ll want to have these additional tools on hand. These tools are necessary to help contractors cut, splice, and test the cables for a successful installation.
Can I install fiber optic cables myself?
It’s possible, but it takes a level of technical expertise and the proper equipment. For complex installations, hiring professionals ensures safety and efficiency.
How do I plan for fiber optic installation?
Begin by evaluating your network requirements, establishing the route of the cable, and identifying environmental considerations such as temperature conditions and obstructions. Planning ahead goes a long way toward avoiding mistakes in the installation choices.
What are the common connection methods for fiber optic cables?
The two primary methods used to join the fibers together are fusion splicing and mechanical splicing. Fusion splicing provides a more robust and stable connection, whereas mechanical splicing is faster and simpler.
How do I test fiber optic cables after installation?
To check the signal coming through your fiber installation, you need a fiber optic power meter. Next, test cable integrity with an optical time-domain reflectometer (OTDR). Testing is the only way to ensure that the system is working properly.
Is fiber optic better than copper cables?
Yes, all cable optic cables deliver faster speeds, longer transmission distances and improved durability over copper cables. They’re perfect for today’s high-speed data demands.